Automating Confluence Posts with Amazon Cloud (AWS)
- 7 minsHow do you automate a job without setting up a dedicated machine?
Some mundane tasks can easily be automated. In my case, I needed something that could post to our Confluence instance at a specific time every week. This is because we use blog posts in Confluence for announcing our weekly volunteer meetings and as a simple attendance management.
Posting via Confluence REST API
Confluence, a team collaboration software written in Java and quite often used in corporate environments, offers a REST API that makes it possible to perform many operations on the content. In this case, I was interested in posting new content with some text, and I was getting tired of doing that manually every week. So, I thought: “I spend a lot of time on this task. I should write a program automating it!”.
The first take on that problem was a simple Python script:
import json
import requests

url = "https://some-confluence-url.com/rest/api/content/"
headers = { "content-type": "application/json" }
payload = { "type": "blogpost",
            "title": "Fancy meeting title",
            "space": {
                "key": "mySpaceNameGoesHere"
            },
            "body": {
                "storage": {
                    "representation": "storage",
                    "value": "Meeting description goes here."
                }
            }
            #"history": {
            #    "createdDate": '2017-01-10T14:00:00.000Z'
            #},

        }

response = requests.post(url,
                         data=json.dumps(payload),
                         headers=headers,
                         auth=("myUserName", "mySecretPassword"))
print json.dumps(response.json(), indent=4, sort_keys=True)
You should be able to run this script against your end-point and post your content. Just note that I used requests library here that needs to be installed separately, for instance, by using pip:
sudo pip install requestsAlso, you will need to update the following values in the script:
url– the URL to your sitetype– can be ablogpostor apagetitle– page or post titlespace– a Confluence space where the post will belongvalue– content of the page, can contain HTML tagsauth– username and password (please note that, for security reasons, it might be a good idea to create a separate user with restricted access rights just for posting specific content)createdDate– you can also add the commented-out part to add a specific blog post date
The script uses basic authentication to post the content and, if successful, returns metadata about the post as a response. If it fails, the response from Confluence end-point should point you in the right direction.
Creating a Lambda Function in AWS
Now we are one step closer to automation. The script works, and we can post content with a simple push of a button. What now?
Well, now I needed something to run that script and something to trigger that action. The trigger is the time as I wanted to run our script weekly, but first I needed to deploy our script to the Cloud. Scheduling and triggers would come later.
Since we had some infrastructure on AWS already, I decided to deploy the script on the same platform. I wanted to deploy it as a simple stand-alone function in the Cloud – in AWS world it is called a Lambda function.
I started by wrapping our code into a function and making it AWS Lambda function compatible – to define a function that takes two arguments: event and context. I choose to call the function blogpost_handler:
#!/usr/bin/python
# -*- coding: utf-8 -*-

# File name: poster.py

import requests
import json
import datetime

def blogpost_handler(event, context):

    # Script is run on Sunday, need to use date for Tuesday
    next_tue = (datetime.datetime.now()
                    +datetime.timedelta(days=2)).strftime("%Y-%m-%d")

    url = "https://some-confluence-url.com/rest/api/content/"
    headers = { "content-type": "application/json" }
    payload = { "type": "blogpost",
                "title": "Meeting: "+next_tue,
                "space": {
                    "key": "mySpaceNameGoesHere"
                },
                "body": {
                    "storage": {
                        "representation": "storage",
                        "value": "Meeting description goes here."
                    }
                }
            }


    response = requests.post(url,
                             data=json.dumps(payload),
                             headers=headers,
                             auth=("myUserName", "mySecretPassword"))

    print json.dumps(response.json(), indent=4, sort_keys=True)

    return response.json()
Now, I needed to package the code to make it ready to deploy:
# 1. create folder
mkdir blogposter
cd blogposter
# 2. create and copy the code above into poster.py
touch poster.py
# 3. install requests package locally
pip install requests -t .
# 4. zip contents of the folder and create a zip file in a parent directory
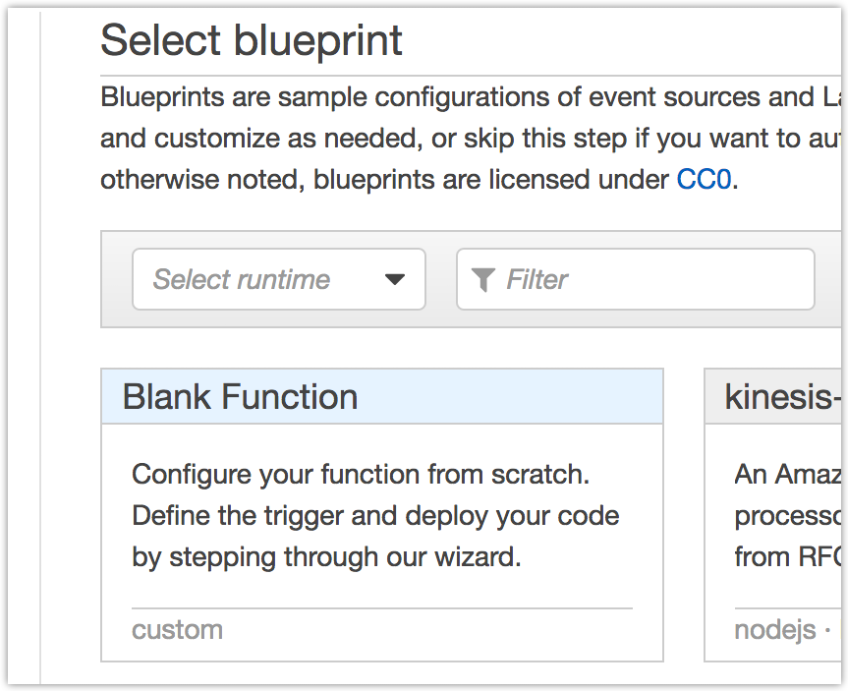
zip -r9 ../pyposter.zip *And we are ready to deploy to AWS! Start with creating a new Lambda Function and selecting a blank function for this job.
I didn’t choose any triggers for now and continued to the configuration page. When presented with function configuration you need to give it a name, description, runtime, and a .zip file with the code. At the end, you will need to define a handler (which will typically be filename.function_name), and a role.

At the end of the wizard, you can run it manually by pressing the Test button. If you did all the steps above, this should now create a new post on your Confluence. Congratulations, you have now set up a stand-alone function in the Cloud!
Schedule it!
Now that I have automated the task and deployed it to the Cloud, I needed something to trigger that function. In this case, I wanted to schedule it to run weekly, so function was set to be triggered by the CloudWatch events. It offers a good support for scheduling Lambda expressions.
I defined event source as a cron expression, and a target as a Lambda function I created in the previous step.
# 9:05, every Sunday
5 9 ? * 1 *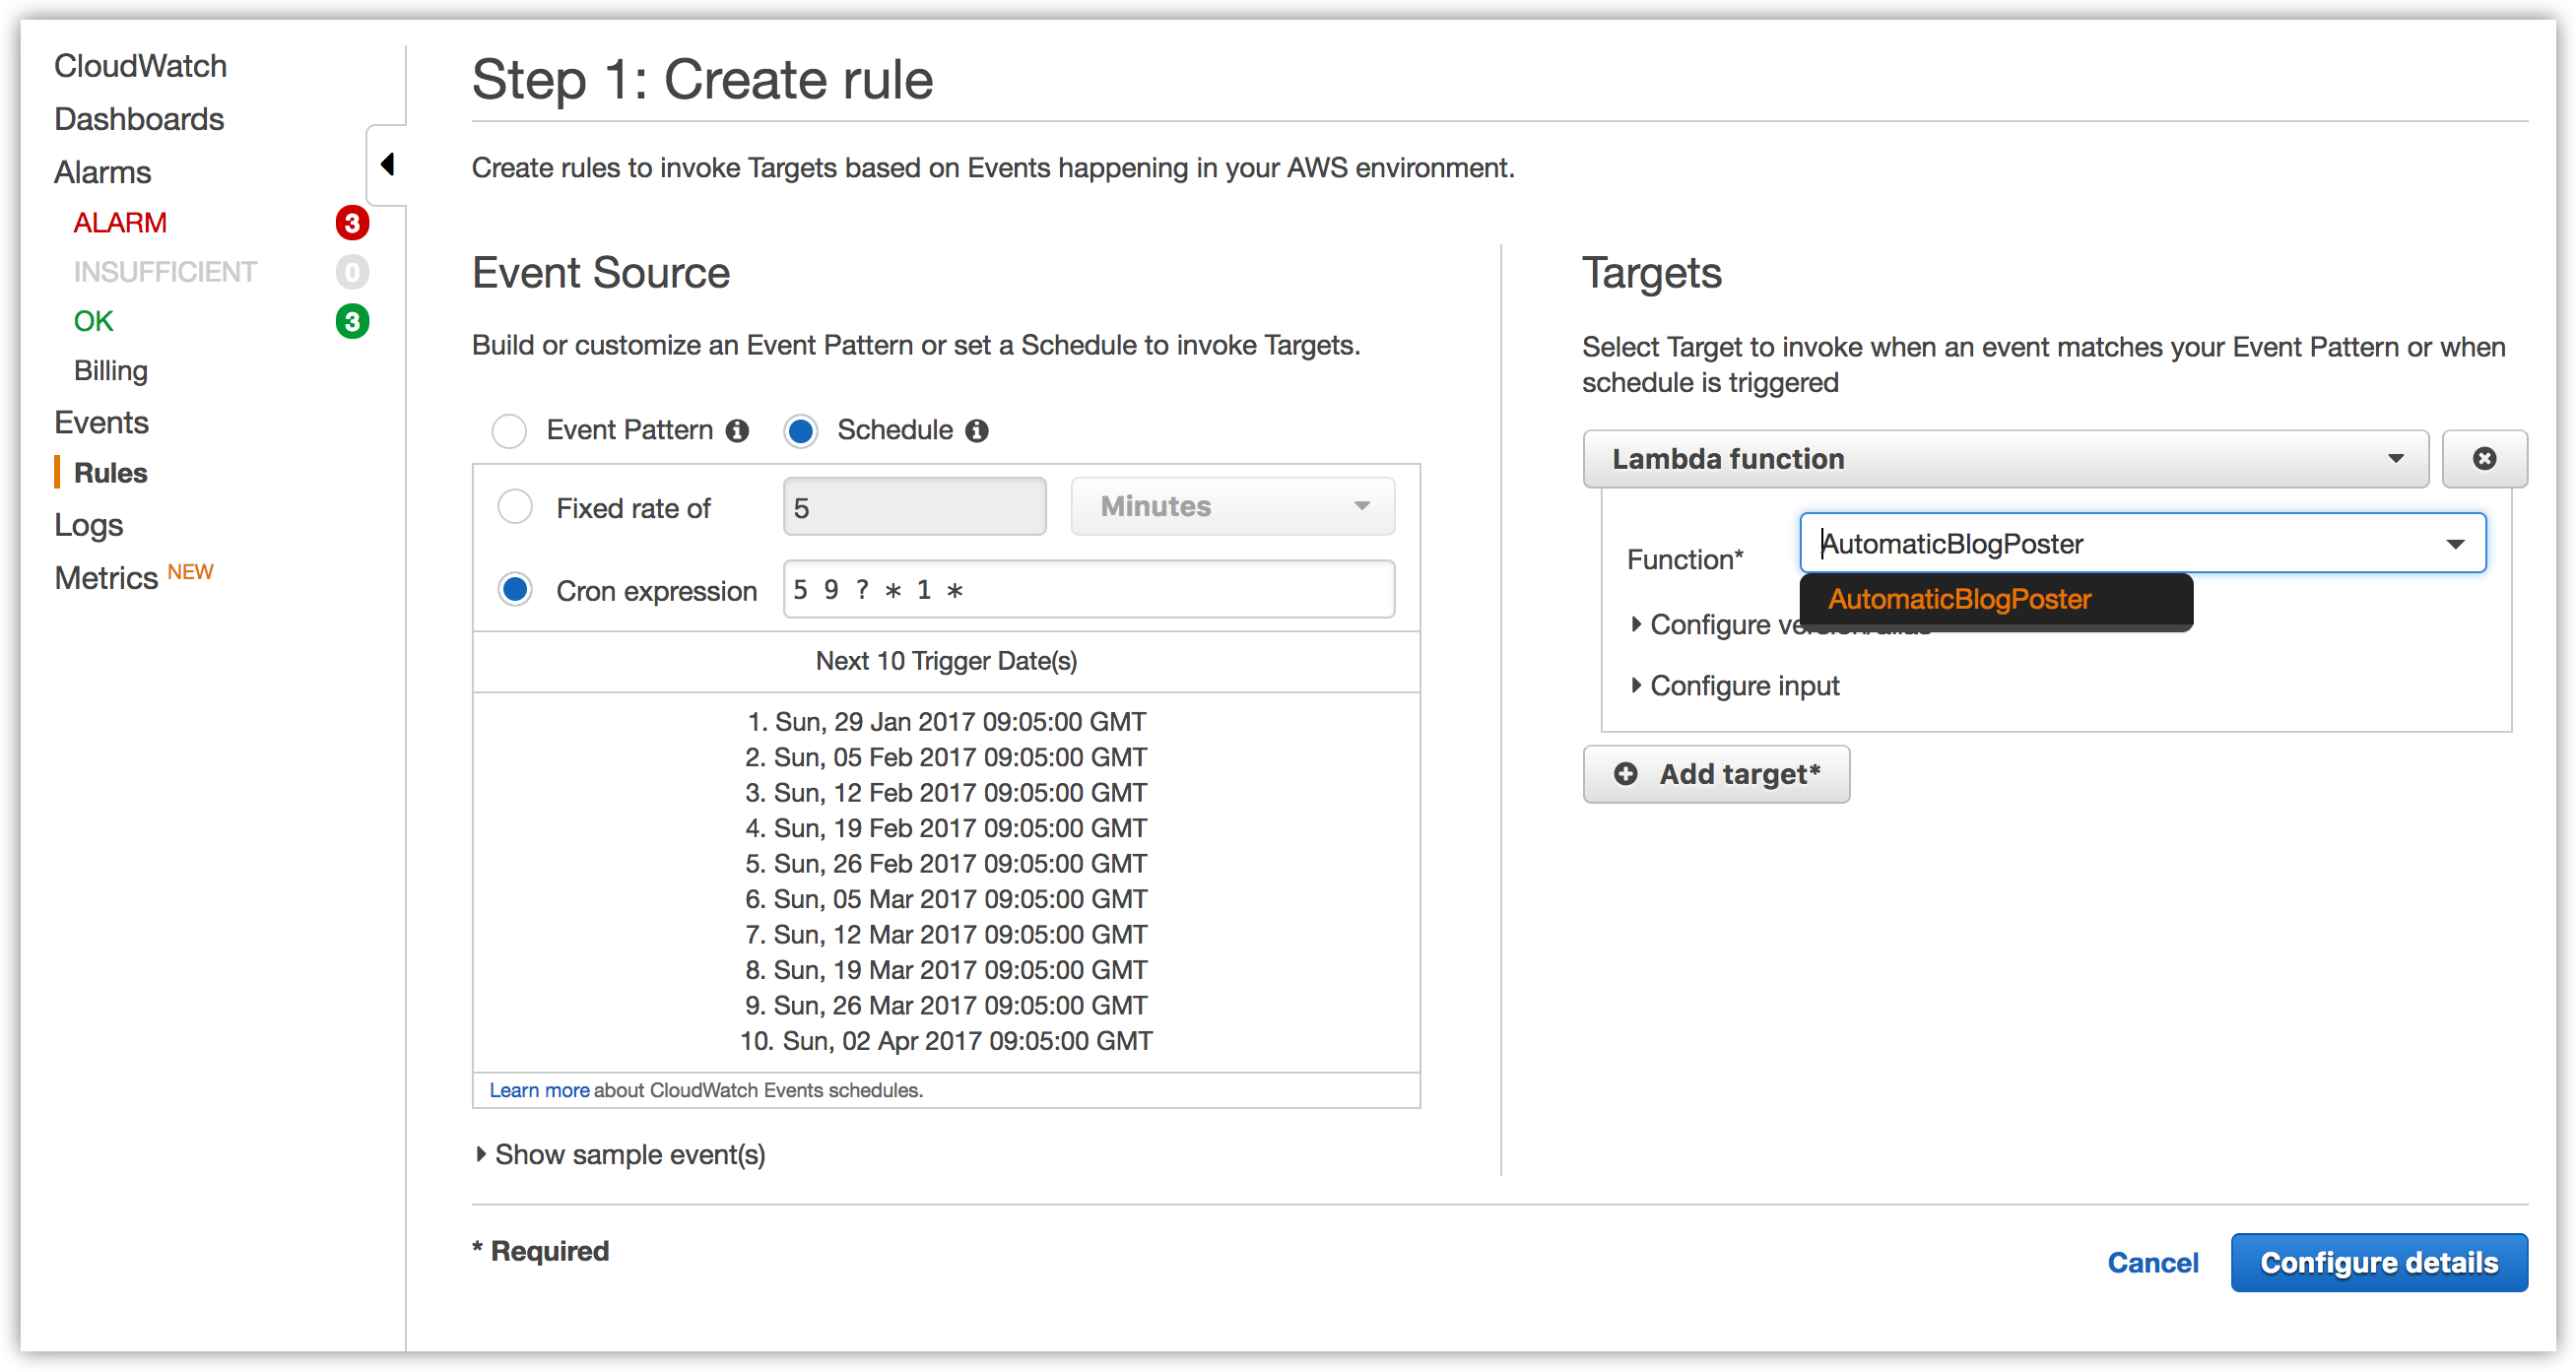
Now you (and I) have a function that is scheduled to run weekly and does not require a dedicated machine to run. It also has some good options for logging and sending alarms in case it fails.